Development Guide#
We are excited for any contributions from the community, we welcome any feedback whether its:
- Submitting a bug report
- An idea for feature development
- Expanding the functionality of an existing feature
- Submitting an example guide or blog using Bitops
- Security or other concerns
When contributing to BitOps, please consider some of the following basic guidelines before submitting.
Requirements#
To submit changes we require that all contributions first have a GitHub issue created where submissions can be discussed and visible to all Contributors and Maintainers.
By contributing, you agree to the Developer Certificate of Origin (DCO) which states that the code being submitted is owned wholly by you.
Contributors and Maintainers are expected to treat other community members with courtesy and respect, be willing and able to accept constructive criticism, and strive for understanding of other's viewpoints in all community channels.
Building BitOps#
Before continuing, if you haven't used GitHub before you may want to review GitHub's forking guide and cloning guide which further explains how to clone a repo for any major operating system.
To develop BitOps, first fork BitOps to create a copy of the BitOps GitHub repo under your own account:
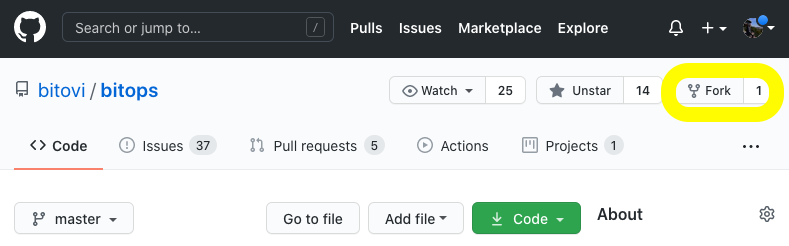
Then you need to clone your personal copy of the repository you just forked. Clicking the green Code button on your repo will give you a copiable URL to use:
git clone git@github.com:<your github username>/<repository-name>.git
cd bitops
git checkout -b your-branch-name
Replace your-branch-name with the name of the feature you're building, e.g. git checkout -b some-ansible-feature to create a some-ansible-feature branch.
As you're forking the code to work locally, you may not need or wish to create a separate branch, however, BitOps will not allow commits directly to main and it's just a good habit to get into!
Then after modifying the code or adding your changes, re-build the BitOps docker image:
docker build bitops --tag bitovi/bitops:ansible-feature
You can now execute your modified version of BitOps locally to test your changes.
For example, to test your new ansible-feature version of BitOps with an Operations Repo environment named ansible-operations-repo containing an Ansible playbook and other data:
export AWS_ACCESS_KEY_ID=ABCDEF012345
export AWS_SECRET_ACCESS_KEY=ZYXWV09876
export AWS_DEFAULT_REGION=us-east-1
export MY_VAR1=value1
docker run \
-e BITOPS_ENVIRONMENT="ansible-operations-repo" \
-e AWS_ACCESS_KEY_ID=$AWS_ACCESS_KEY_ID \
-e AWS_SECRET_ACCESS_KEY=$AWS_SECRET_ACCESS_KEY \
-e AWS_DEFAULT_REGION=$AWS_DEFAULT_REGION \
-e MY_VAR1=$MY_VAR1 \
-v $(pwd):/opt/bitops_deployment \
bitovi/bitops:ansible-feature
Understanding Bitops#
BitOps has several packages and environment variables readily available which makes working with BitOps easy.
Standard Bitops Environmental Variables#
A * denotes a required variable.
| Variable | Value | Notes |
|---|---|---|
$BITOPS_DIR |
/opt/bitops |
Within the container the default working directory for BitOps |
$BITOPS_ENVIRONMENT* |
YOUR_OPS_REPO_ENVIRONMENT |
BitOps requires at least one environment folder to be specified at container execution. |
$BITOPS_ENVROOT |
$BITOPS_TEMPDIR/$BITOPS_ENVIRONMENT |
e.g /tmp/tmp.RANDOM/YOUR_OPS_REPO_ENVIRONMENT |
$BITOPS_TEMPDIR |
/tmp/tmp.RANDOM |
This is the randomly generated working dir for BitOps. |
$BITOPS_DEFAULT_ROOT_DIR |
/opt/bitops_deployment |
This working dir for BitOps (moved to $BITOPS_TEMPDIR during execution) |
Standard BitOps Packages#
Packages natively available in a running BitOps container:
- ansible
- aws / awscli
- curl
- git
- shyaml
- pip
- rsync
- jq
- unzip
- wget
For the most up-to-date list, see Dockerfile and requirements.txt.
The BitOps repo is fairly straightforward in its current implementation.
See scripts/plugins/ written in Python for most of the logic responsible for running the pipelines that tie together deployment tools like aws, ansible, terraform which are called BitOps plugins.
Additionally, plugins are separated git repositories with instructions about installing the specific tool and running it. If you'd like to add support for the new tool to BitOps, take a look at creating your own plugin.
Creating a PR#
Once you have finished testing your code, please ensure you have first created an issue related to the feature you are developing.
After you ran git add and git commit, push your new branch to Github:
git push --set-upstream origin some-ansible-feature
Once your code has been submitted to Github, navigate to the main BitOps Github page, and click the “New Pull Request” button. You'll want the original BitOps repo you forked from not your personal/modified one.
Select Compare across forks and then select your branch name e.g some-ansible-feature as the 'compare' branch to attempt to merge. You may be warned about conflicts when merging the code, Github will try to tell you what is incorrect.
If you are having issues creating a Pull from your forked repo, GitHub has a more thorough guide than what is presented here.
If you're unable to solve the merge conflicts, don't worry you'll still be able to submit your PR, just make a note of the issues you were facing in the PR description and we will work with you to solve them.
Give your PR a meaningful title and provide details about the change in the description, including a link to the issue(s) relating to your PR. All that's left is to click the 'Create pull request' button and wait for our eager review of your code!
Python Style guide#
- Use 4 spaces for a tab.
- We use
blackcode formatter which automatically enforces consistent style on the whole code base. - You can verify that your modifications don’t break any rules by running the lint script -
tox -e black. - You can autoformat the python code by running
blackmanually or by configuring your favorite editor to do it for you. Here is an example for VSCode. - Pylint is used as a static code analyzer for quick checking for common mistakes and enhancing the python coding standards. You can run it with
tox -e pylint. You can enable pylint in VSCode and other IDEs.
Bash Style guide#
The BitOps container uses the Bourne shell during execution, please ensure all functions used in your submission exist for sh. Submissions that utilize alternate shells (zsh,ksh,csh, etc.) will not be accepted.
BitOps comes packaged with shyaml which can be used to parse YAML config files from stdout.
When contributing Bash code segments to BitOps please keep these concepts in mind:
- Use 2 spaces for a tab.
- Add
echostatements during plugin execution to give verbosity and debugging during execution - Update any related documentation to the code or feature you are modifying
- Avoid multiple commands per line if possible. Replace
;with whitespace and newline characters where appropriate. - For scripts or other subroutines use
_to connect multiple word names, e.gvalidate_env.sh
YAML Style guide#
BitOps uses standard YAML formatting with only a few recommendations regarding style:
- When adding additional YAML files, utilize the full
.yamlfile extension - For multi-word variable names use
-hyphen to connect them, e.gcfn-stack-name.yaml